# Light bulb on/off with remote/timer
# Introduction
In this project, using KiMu's Automate Kit, we are going to build a system that uses a relay switch to automatically turn on/off the light bulb at specific time(s) or to turn on/off the light bulb using a remote control.
# Key skills/Learnings
- Problem Solving
- Logical Thinking
- Working of relay switch
# List of Items
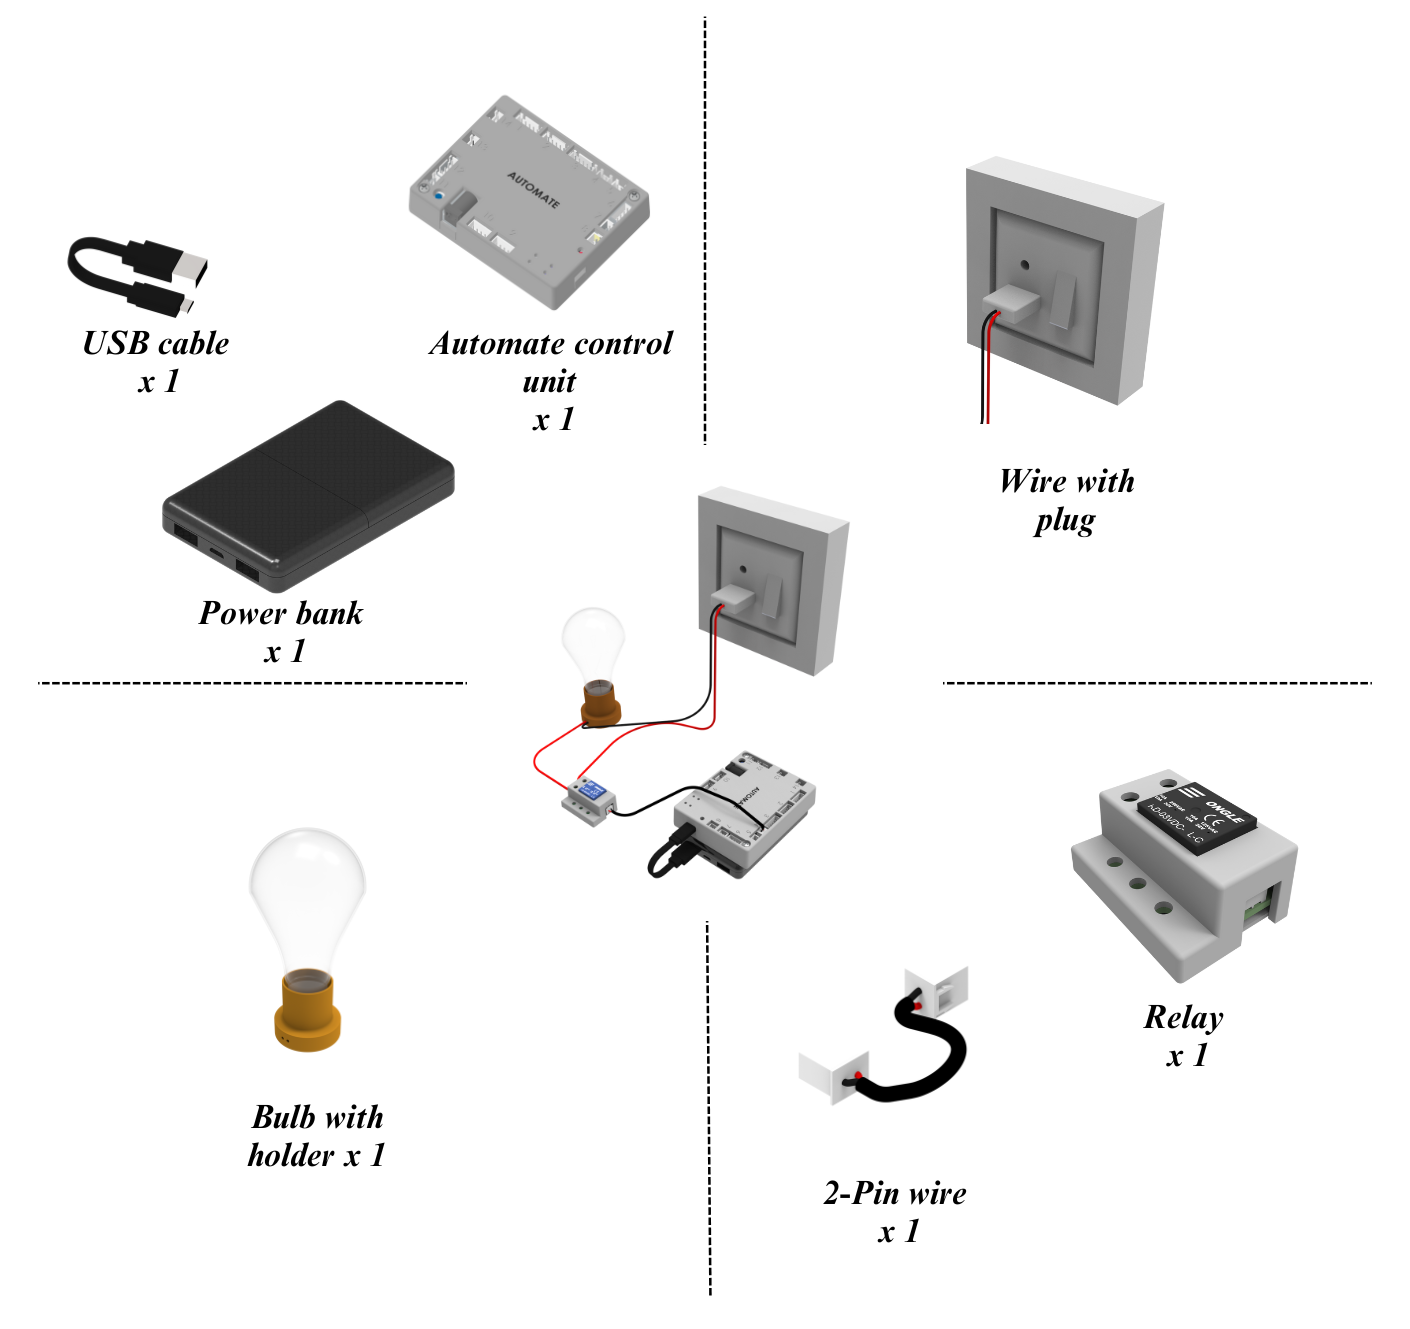
# Assemble the System
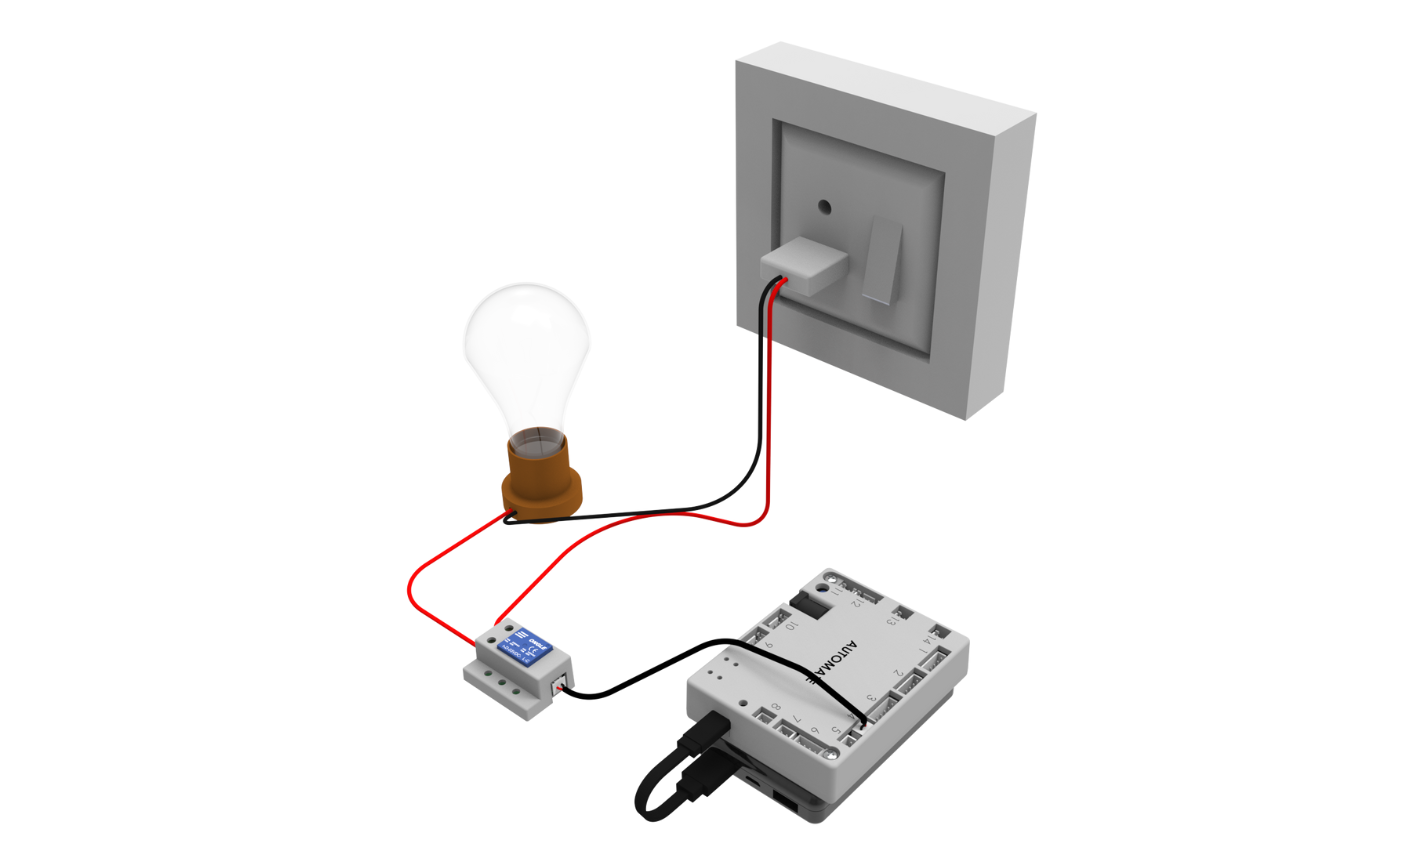
Note: All activities which involve main voltages (voltage greater than 50V) should be performed under adult supervision.
Step 1: Connect the light bulb to the power plug with a wire(black).
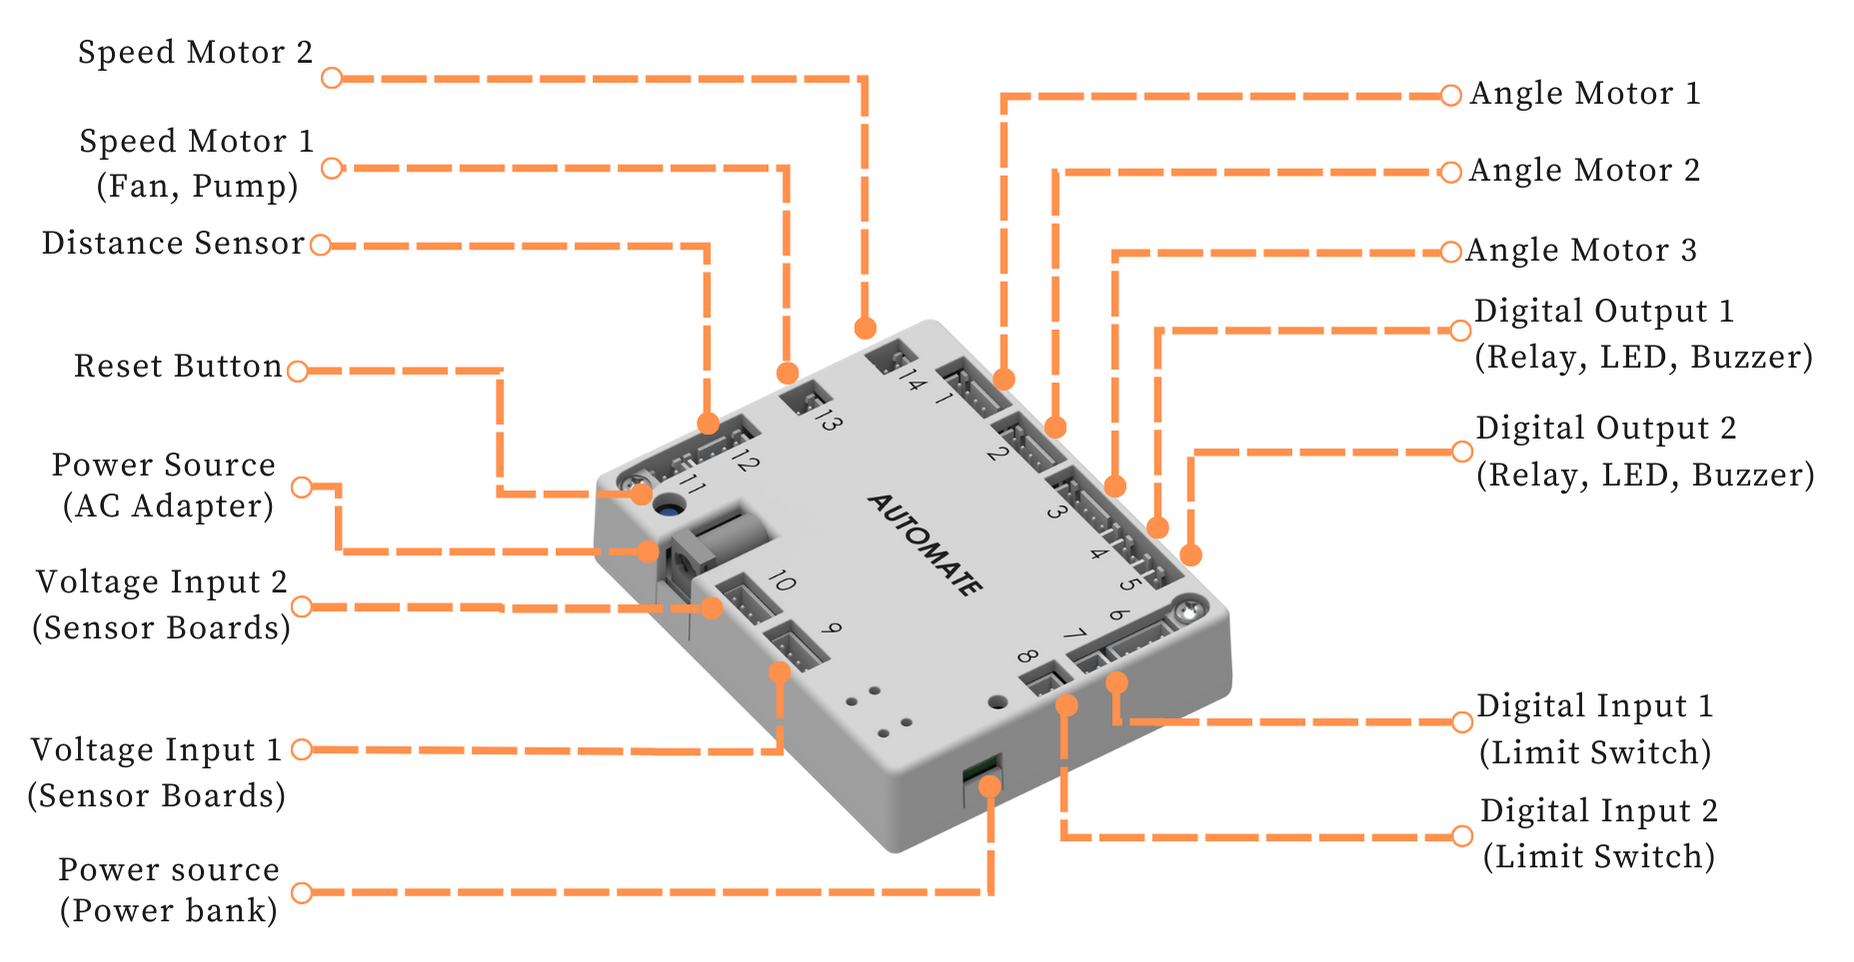
Step 2: Connect one end of the relay to the light bulb with wire(red) and the other end to the power plug.
Step 3: For the connection of Relay and power refer to below image.
# Programming with Automate App
# I. Light bulb on/off with remote
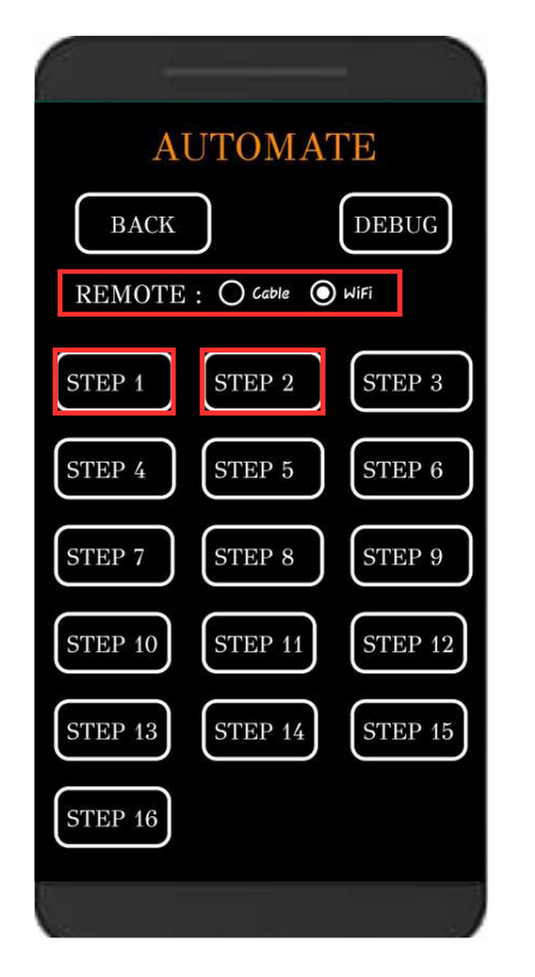
STEP 1 - On
STEP 2 -Off
Note: Automate can be controlled using a cable by selecting the cable option instead of Wi-Fi under the remote option.
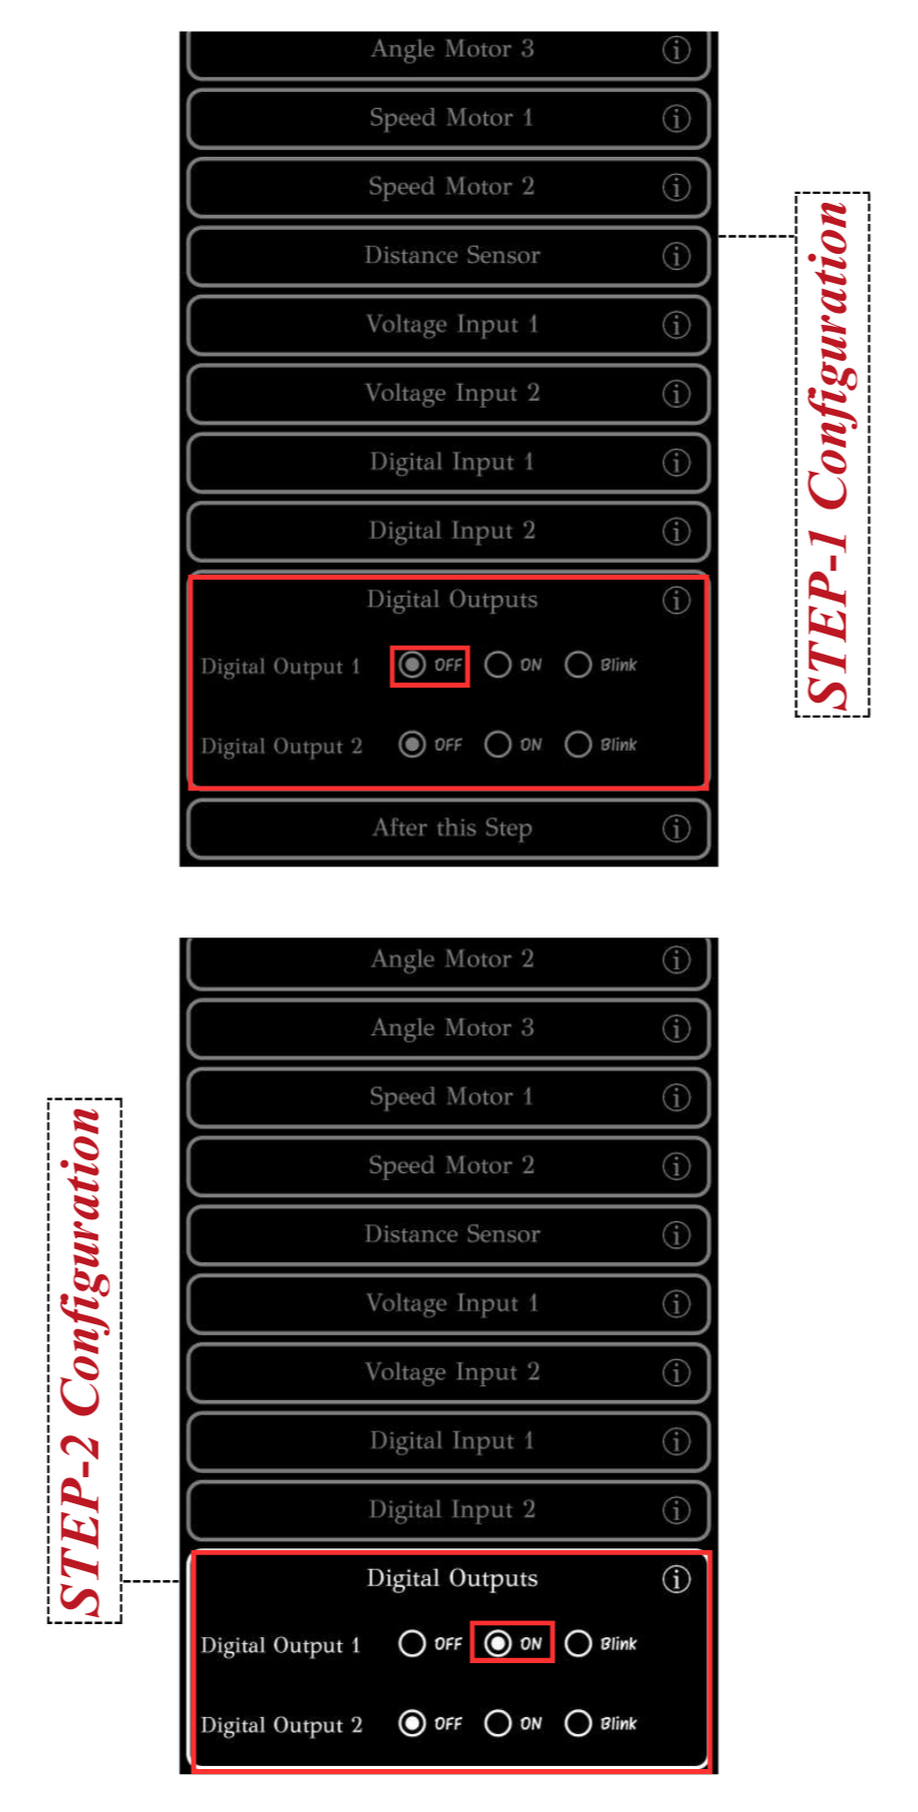
To upload the program, see How to upload the program to the Control Unit with Automate App?
The light bulb can be controlled with remote after uploading this program.
# II. Light bulb on/off with timer
The light can be automatically switched on/off based on time in the automate app settings. In this example, we are going to configure the automate app in such a way that at 18:00 hrs the light will turn on, and at 21:30 hrs it will turn off automatically.
Open the app, Go to Remote → Debug → Settings and follow the below images to set the time and alarm.
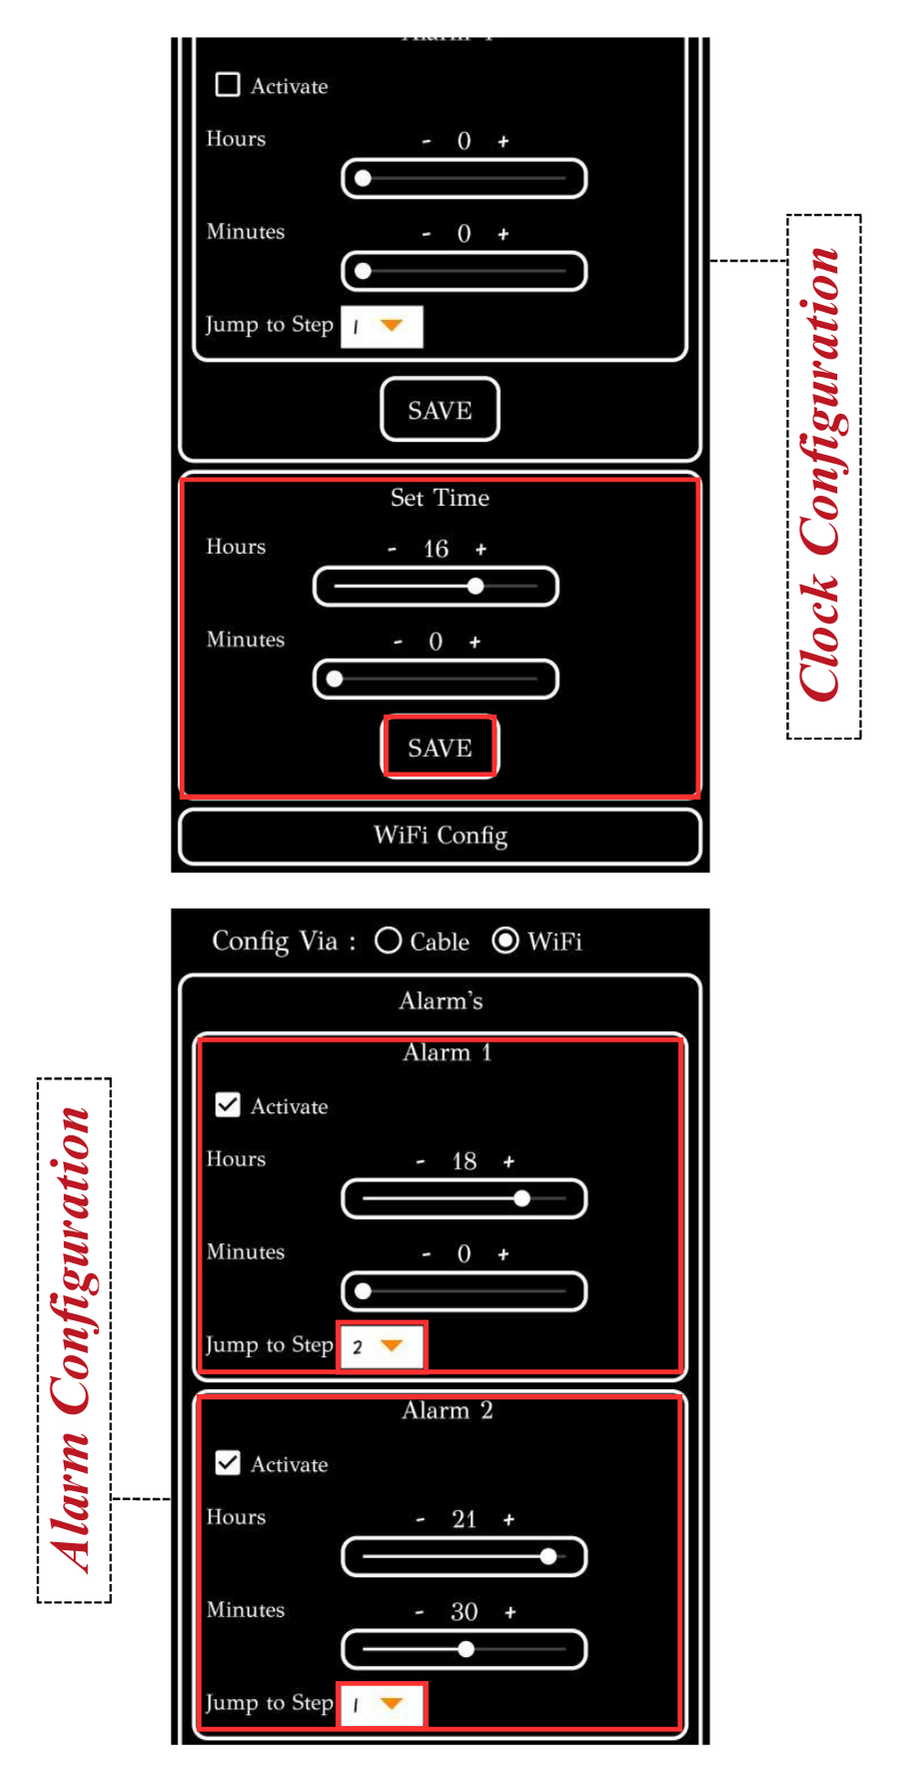
The light bulb can be controlled by Timer(Alarm) after uploading this program.
# More Information
For more details, see FAQs on Automate Kit.