# Soccer Robot
# Introduction
If you love playing with robots around your house, then you will definitely love this one. This Robot can be operated with a remote control to play soccer by kicking the ball. Let's build the Soccer Robot and score goals like Messi, Ronaldo. Soccer Robot is one of the projects available in the KiMu's Automate Kit.
# Key skills/Learnings
- Assembly of Components
- Problem Solving
- Logical Thinking
- Mechanics & Motion
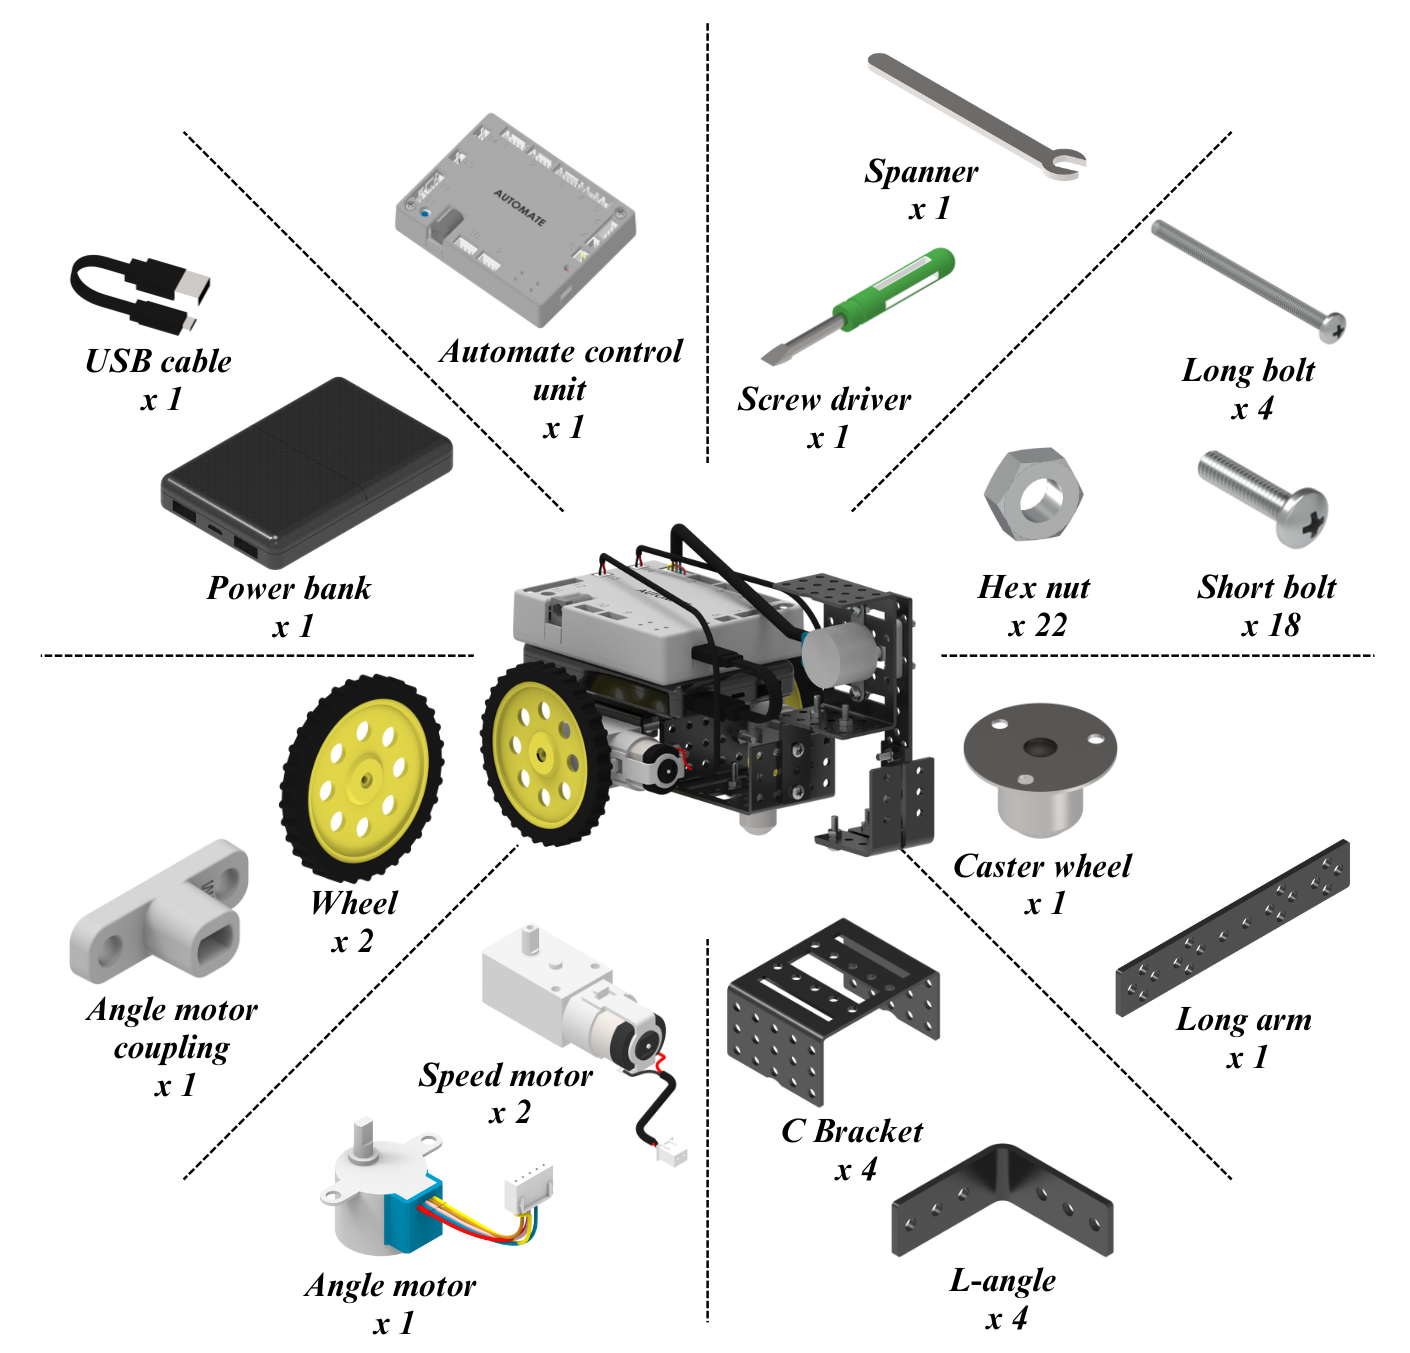
# List of Items
# Assemble the Robot
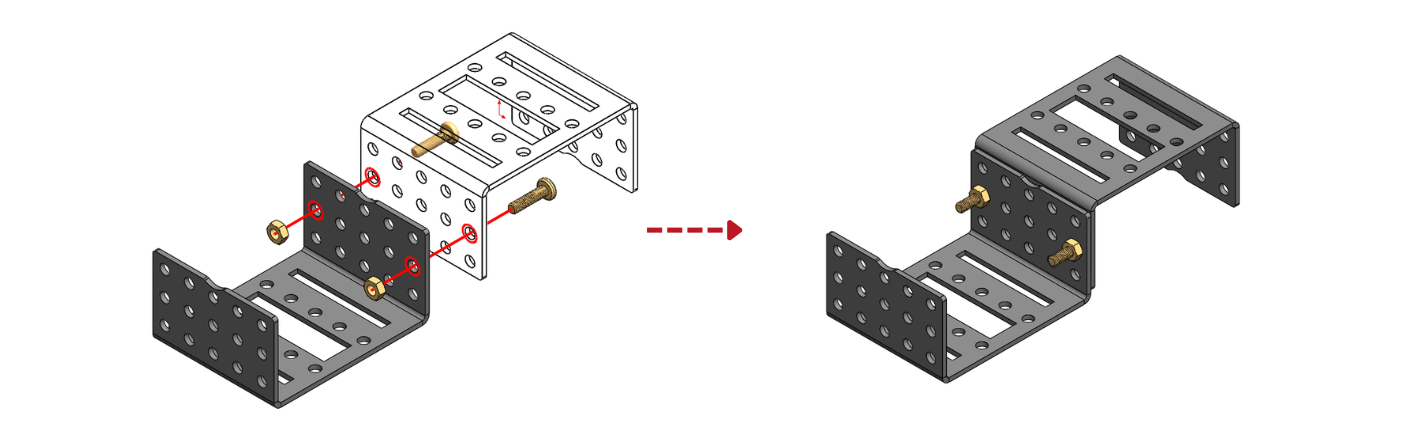
Step 1: Assemble two C-Brackets using short bolts and nuts.
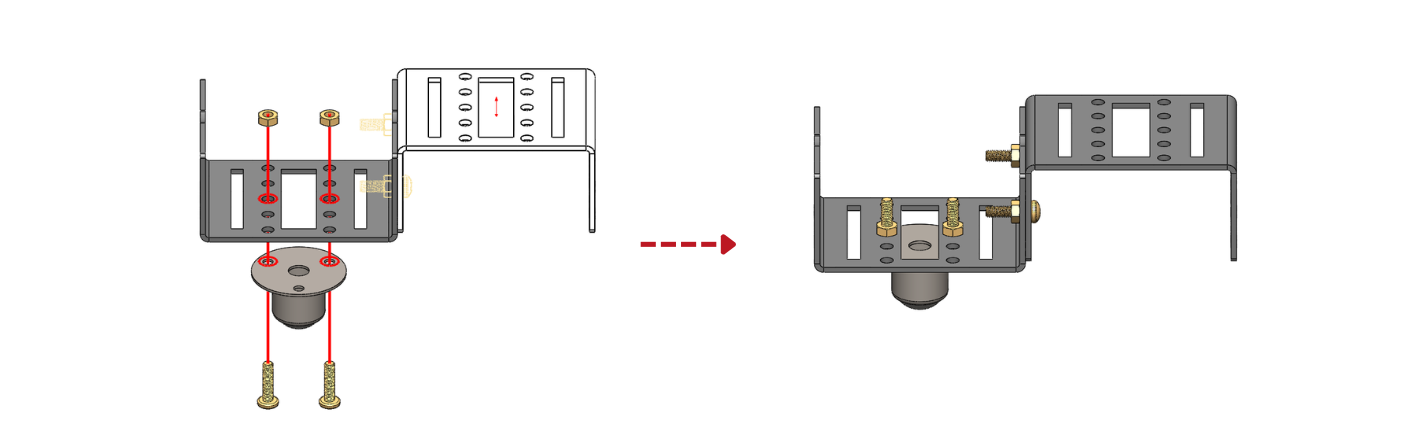
Step 2: Connect the Caster wheel to the C-bracket assembly from step 1 usingshort bolts and nuts.
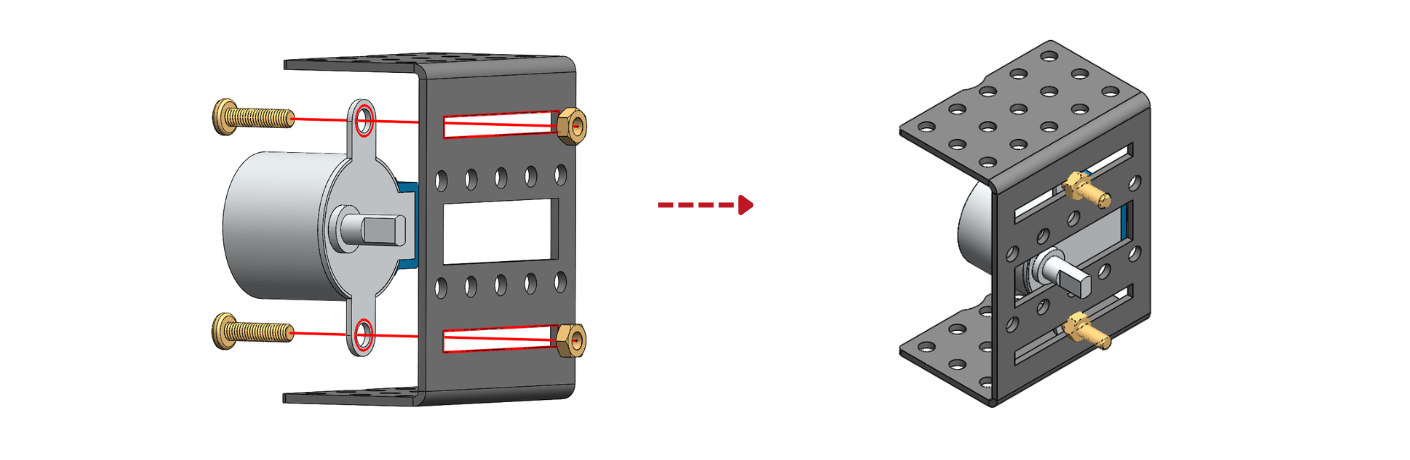
Step 3: Assemble speed motors to new C bracket using long bolts and nuts.
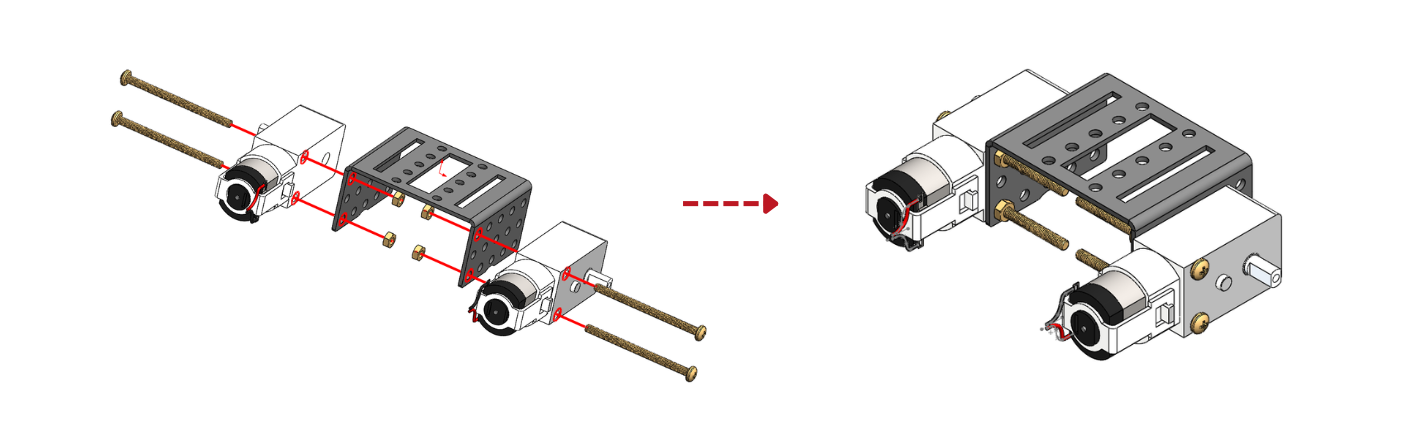
Step 4: Connect the C-bracket assemblies from step 2 and 3 using short boltsand nuts.
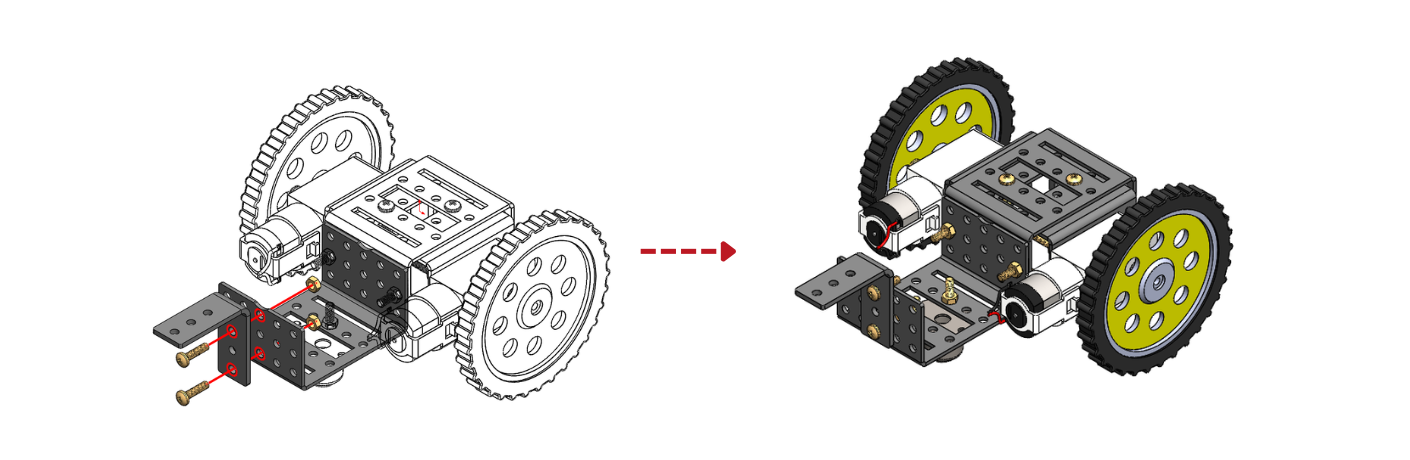
Step 5: Connect the two wheels to the two-speed motors.

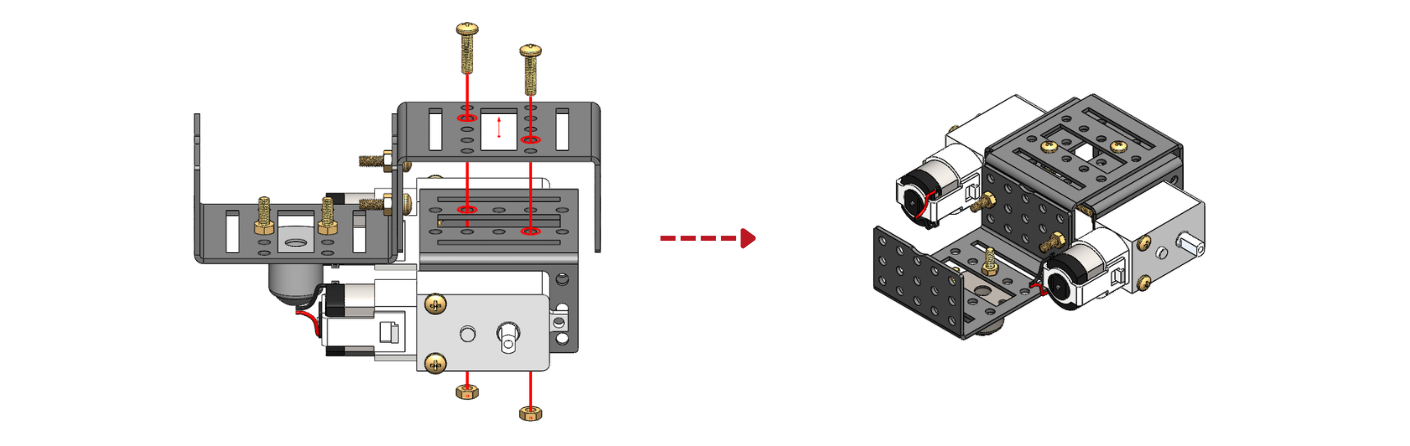
Step 6: Connect the l-angle to the assembly from step 5 using short bolts and nuts.
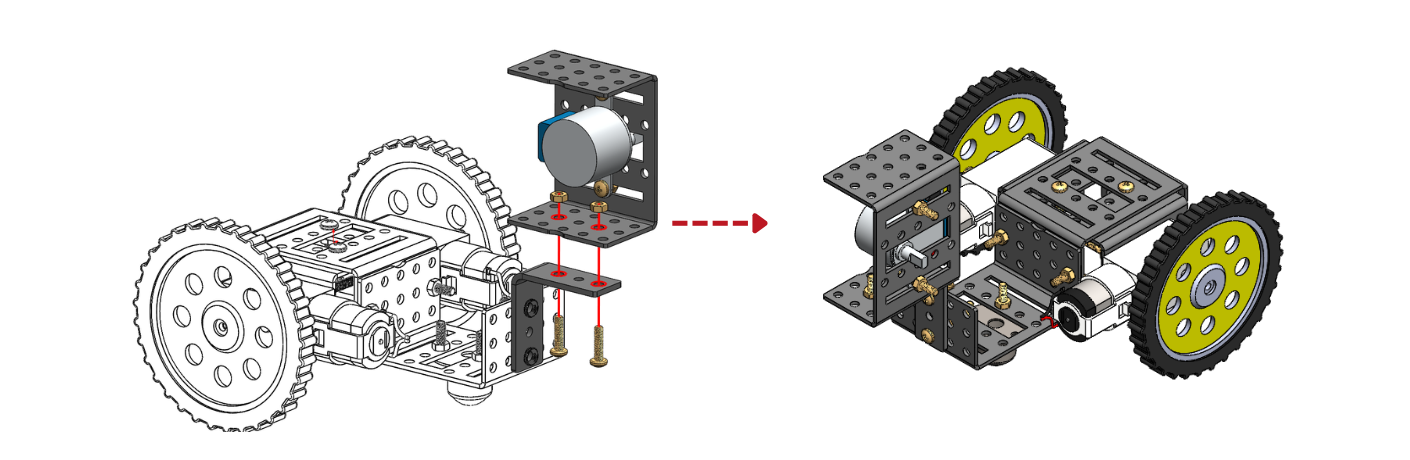
Step 7: Connect the angle motor to the new C bracket using short bolts and nuts.
Step 8: Connect the assemblies from steps 6 and 7 together using short bolts and nuts.
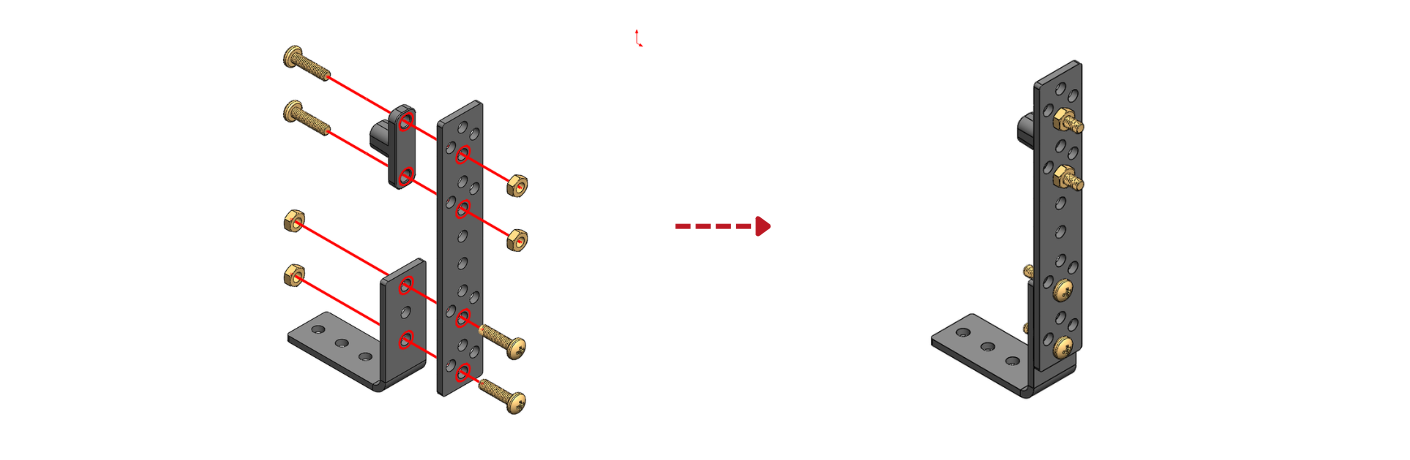
Step 9: Connect long arm, l-angle, and angle motor coupling together using short bolts and nuts.
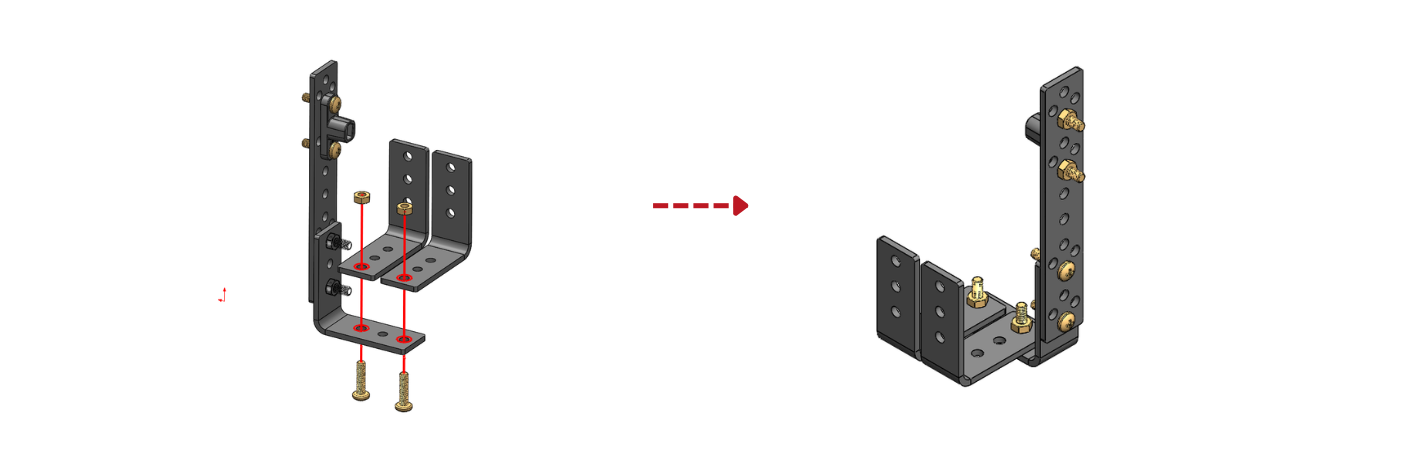
Step 10: Connect two l-angles to the assembly from step 9 using short bolts and nuts.
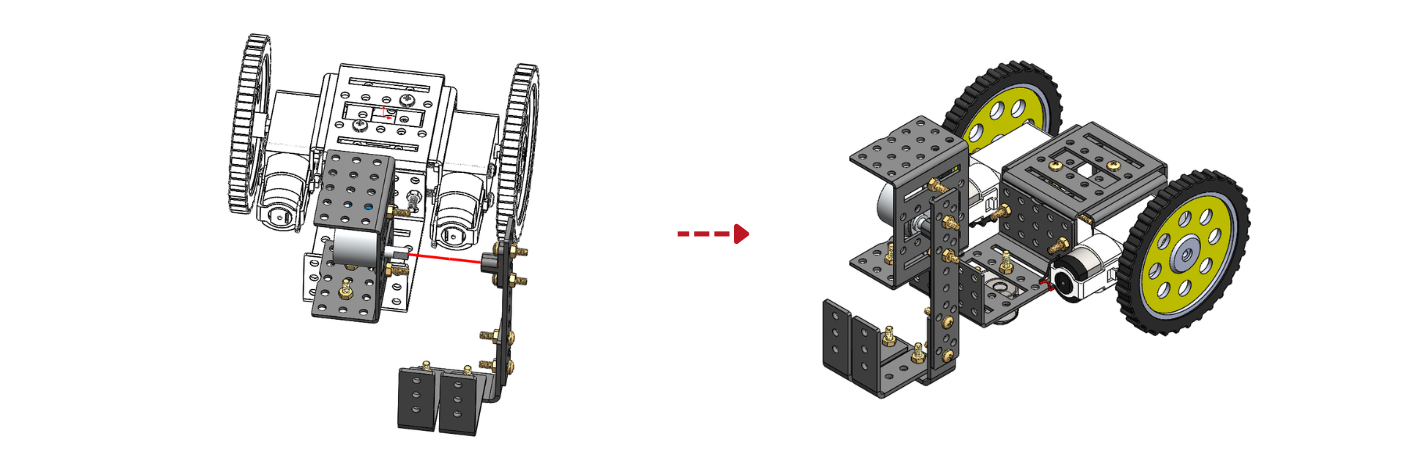
Step 11: Attach the angle motor coupling from the step 10 assembly to the angle motor from the STEP 8 assembly together.
Step 12: Use Double side tape to stick the controller, power bank and the above assembly together.
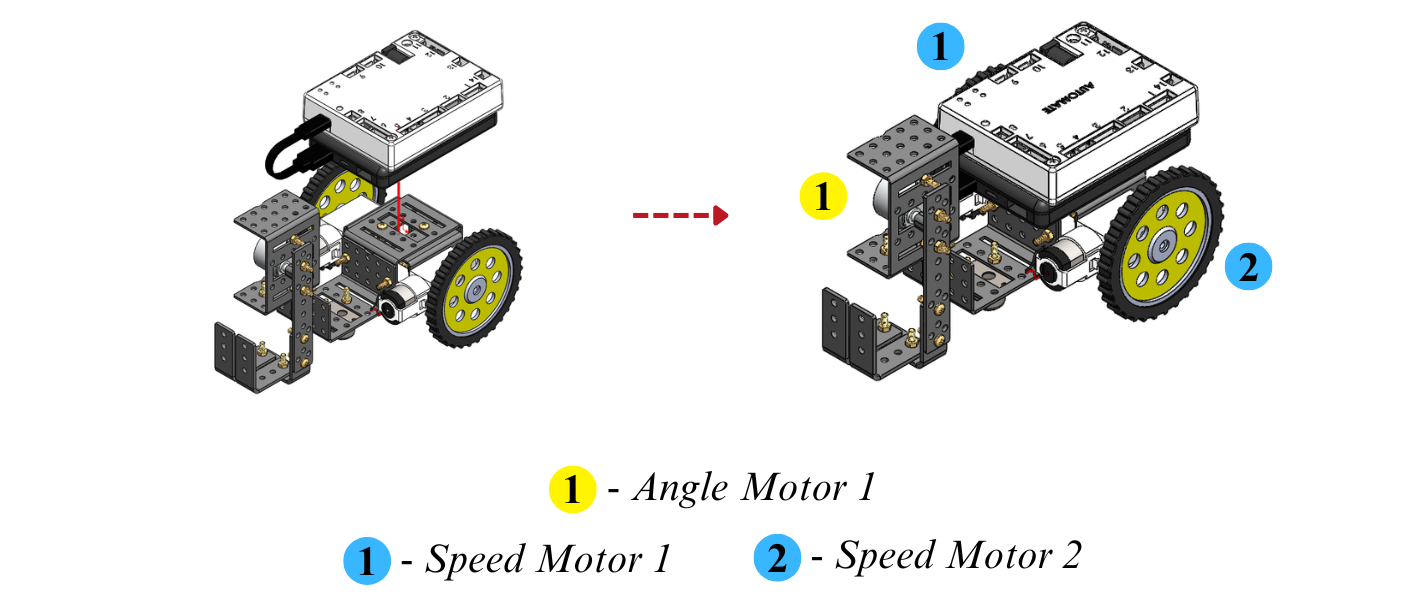
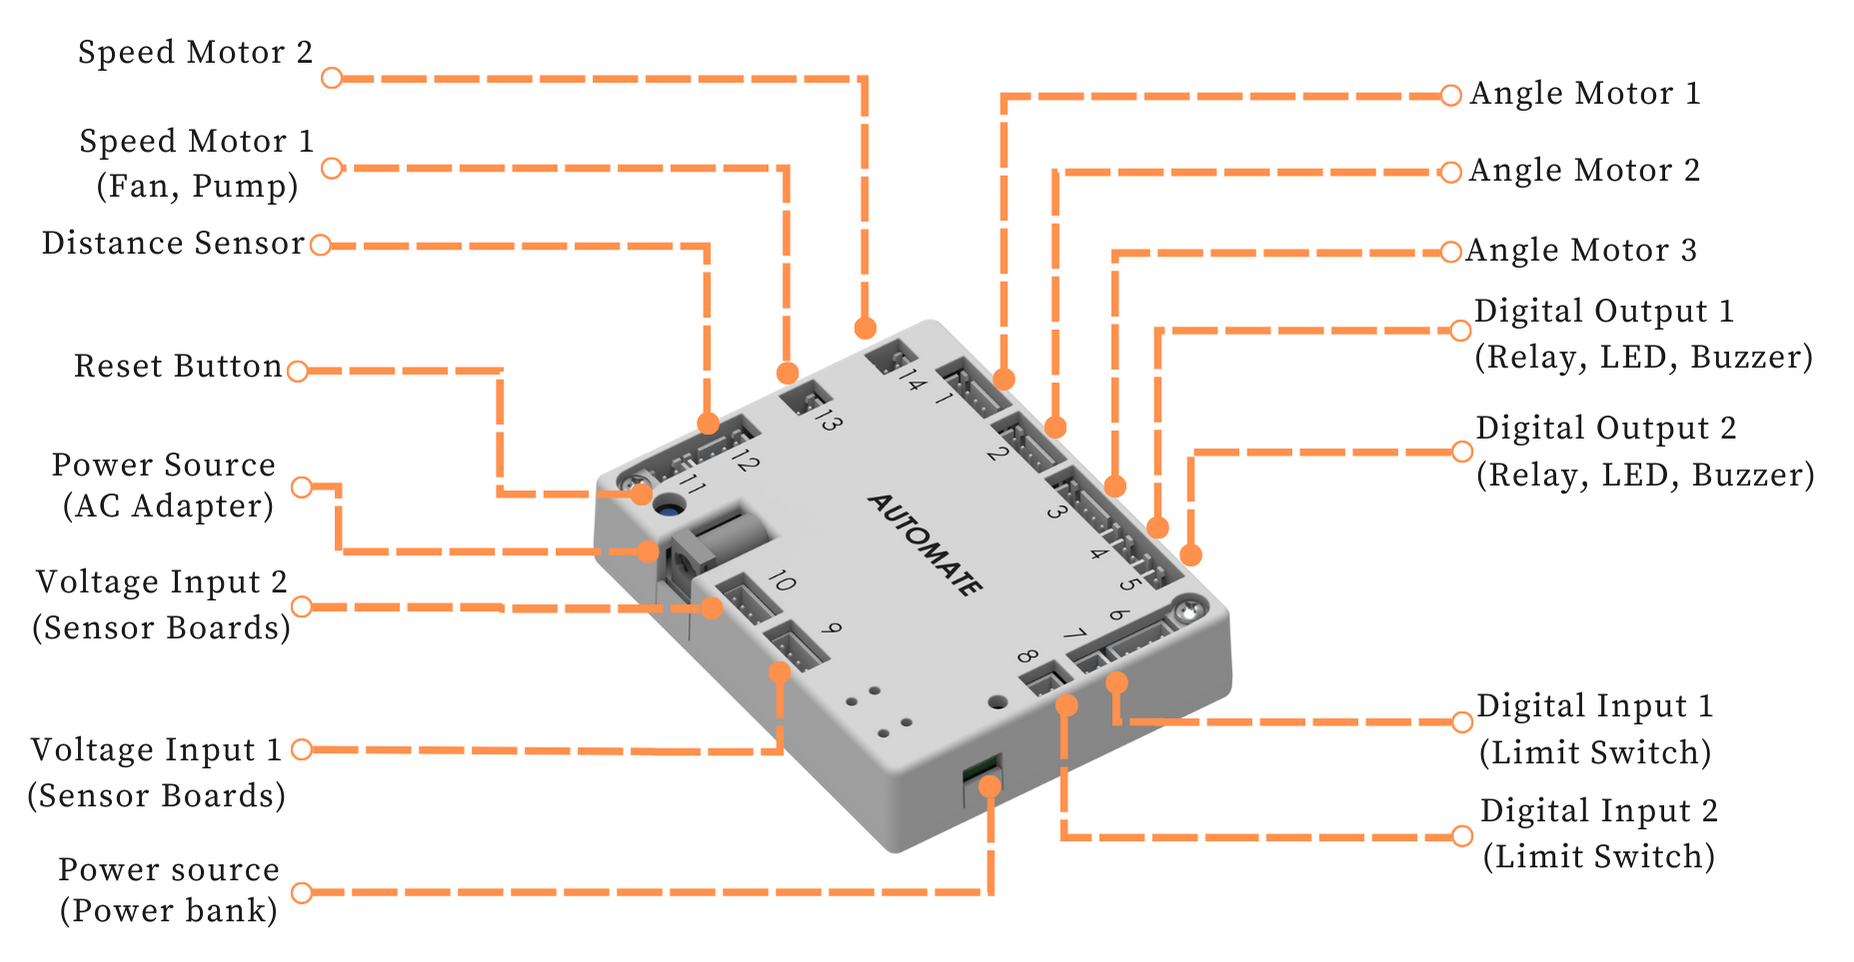
Step 13: For the connections of Speed motors, Angle Motors, and power refer to below image.
# Programming with Automate App
# Configuring the app - Remote controls setup
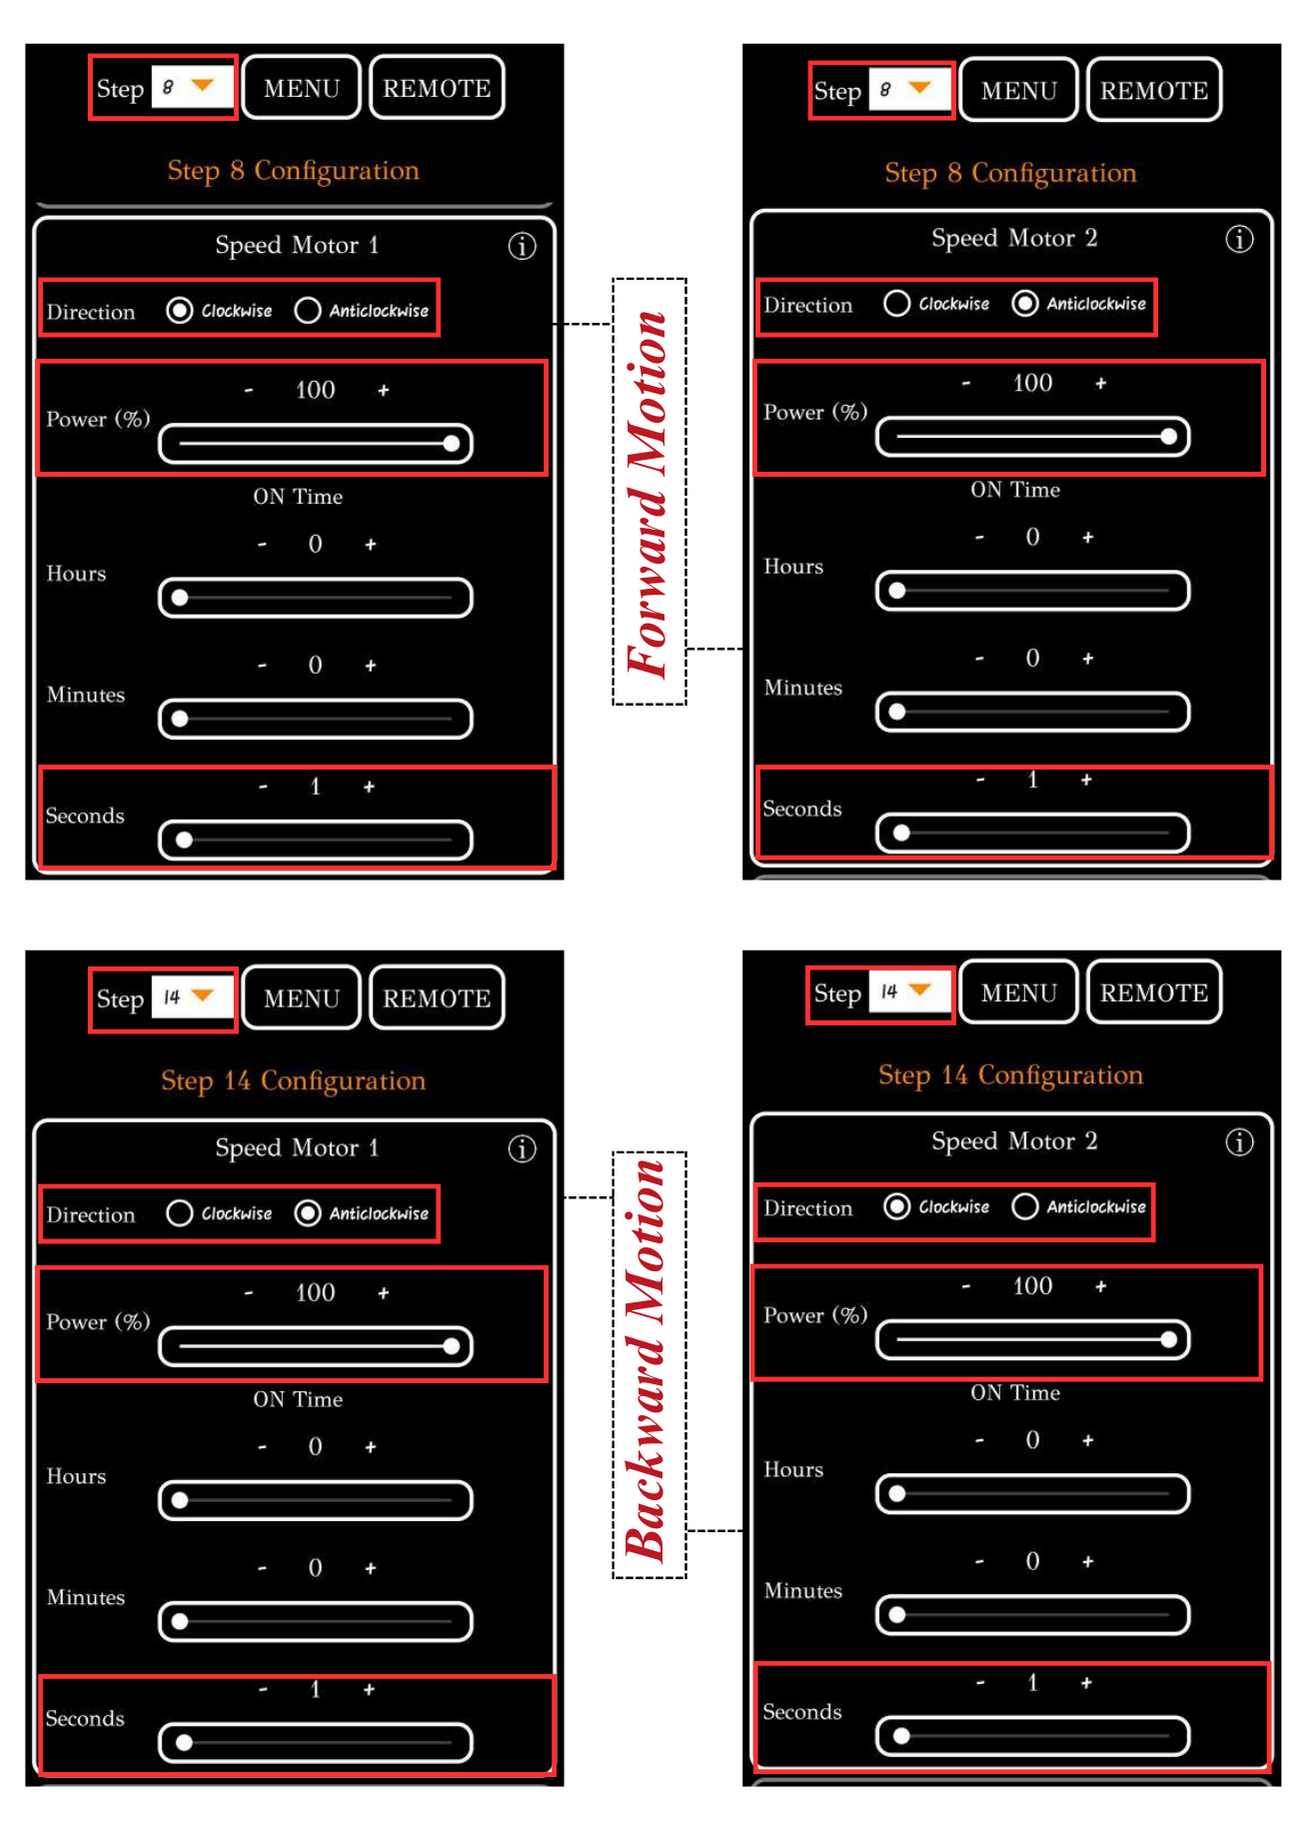
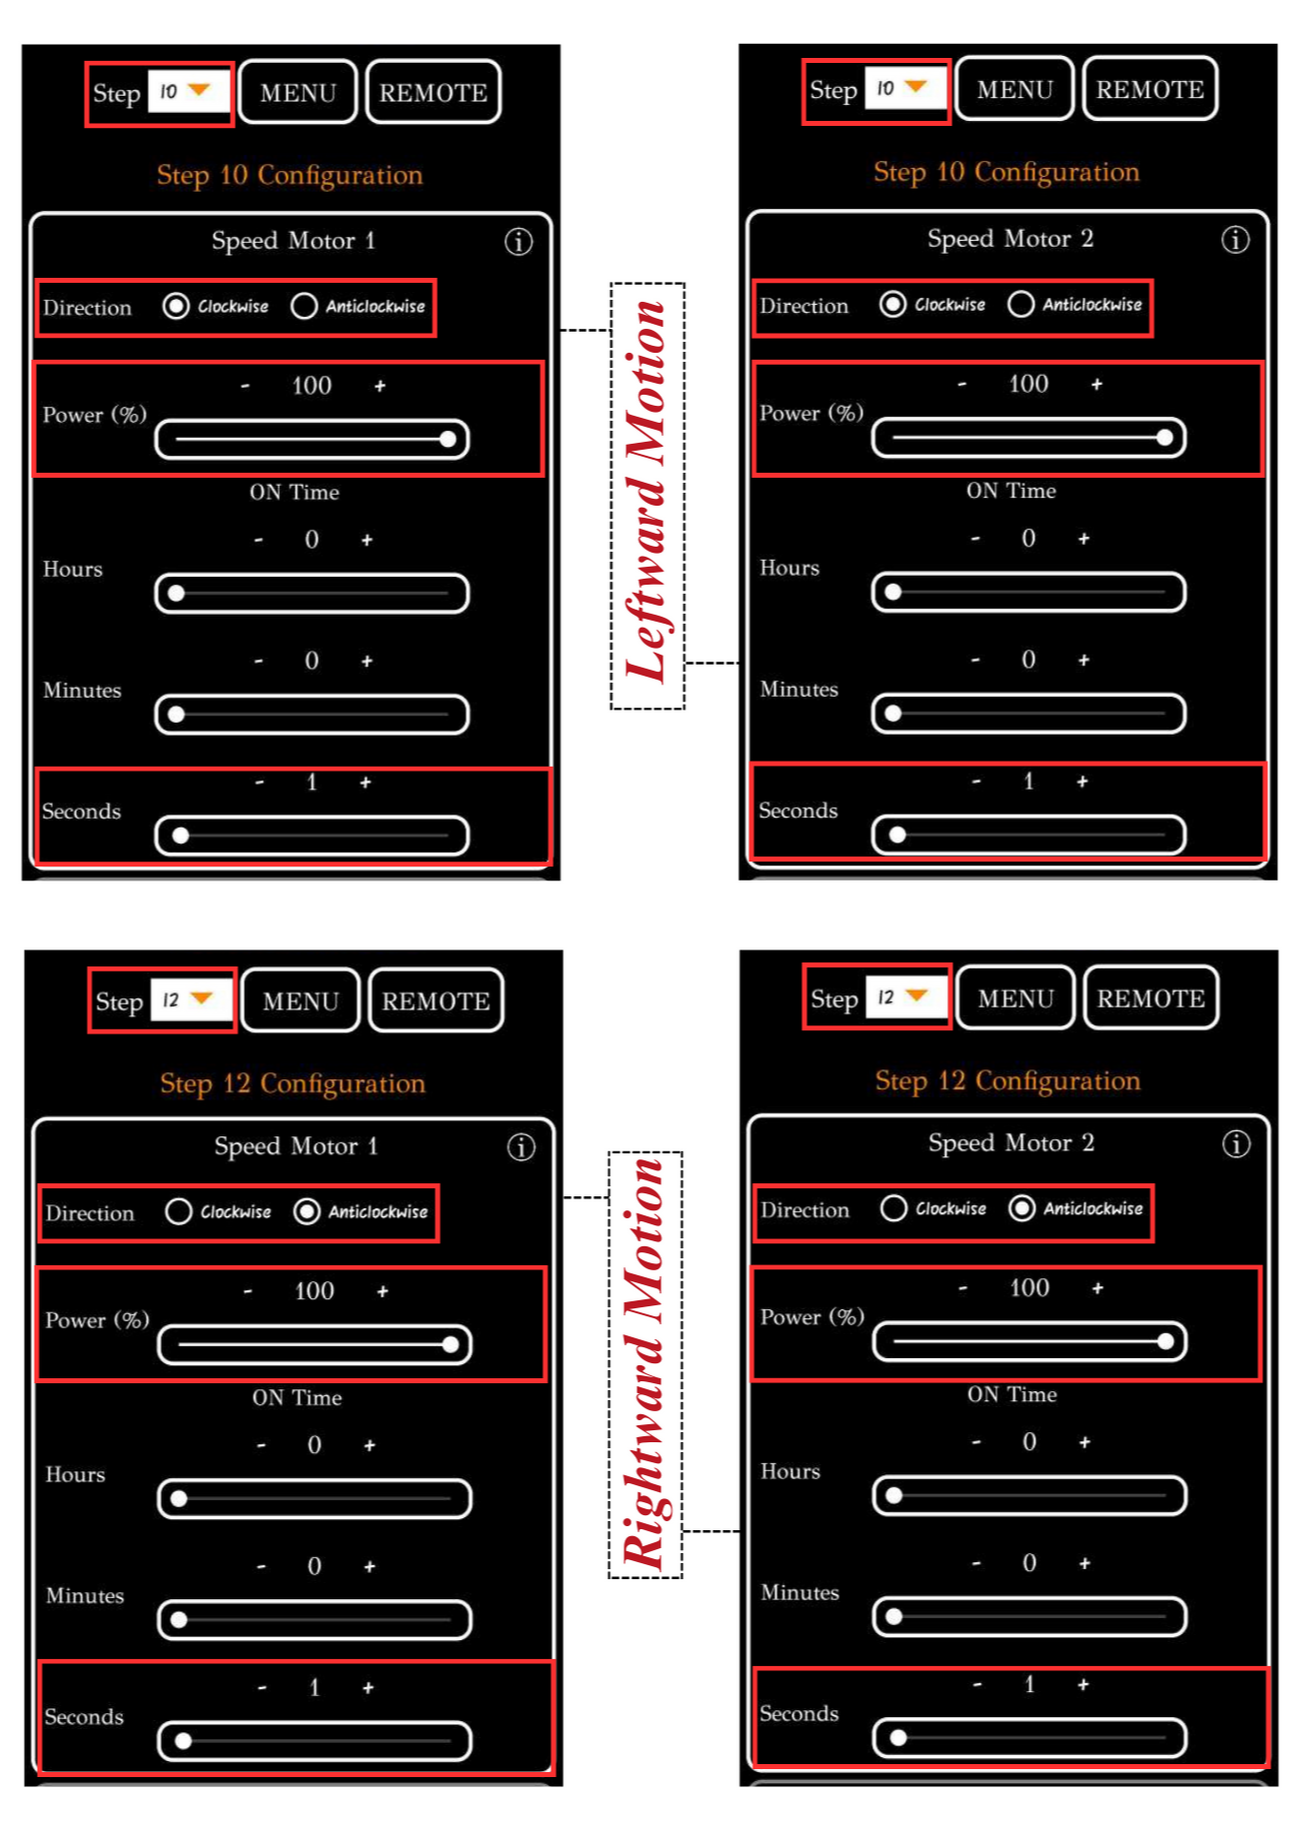
STEP Buttons are configured as shown in the image below to represent the arrows used in the game. These configurations can be altered by the user according to their needs or requirements.
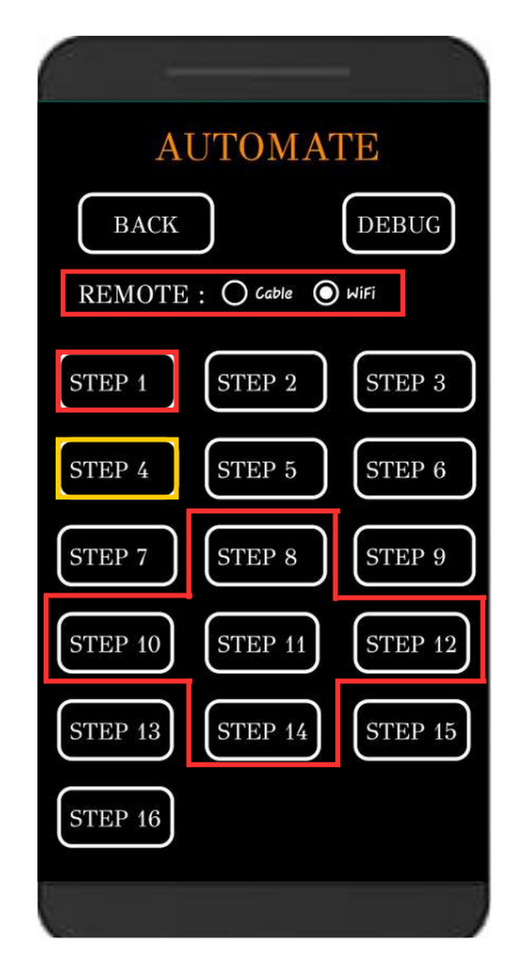
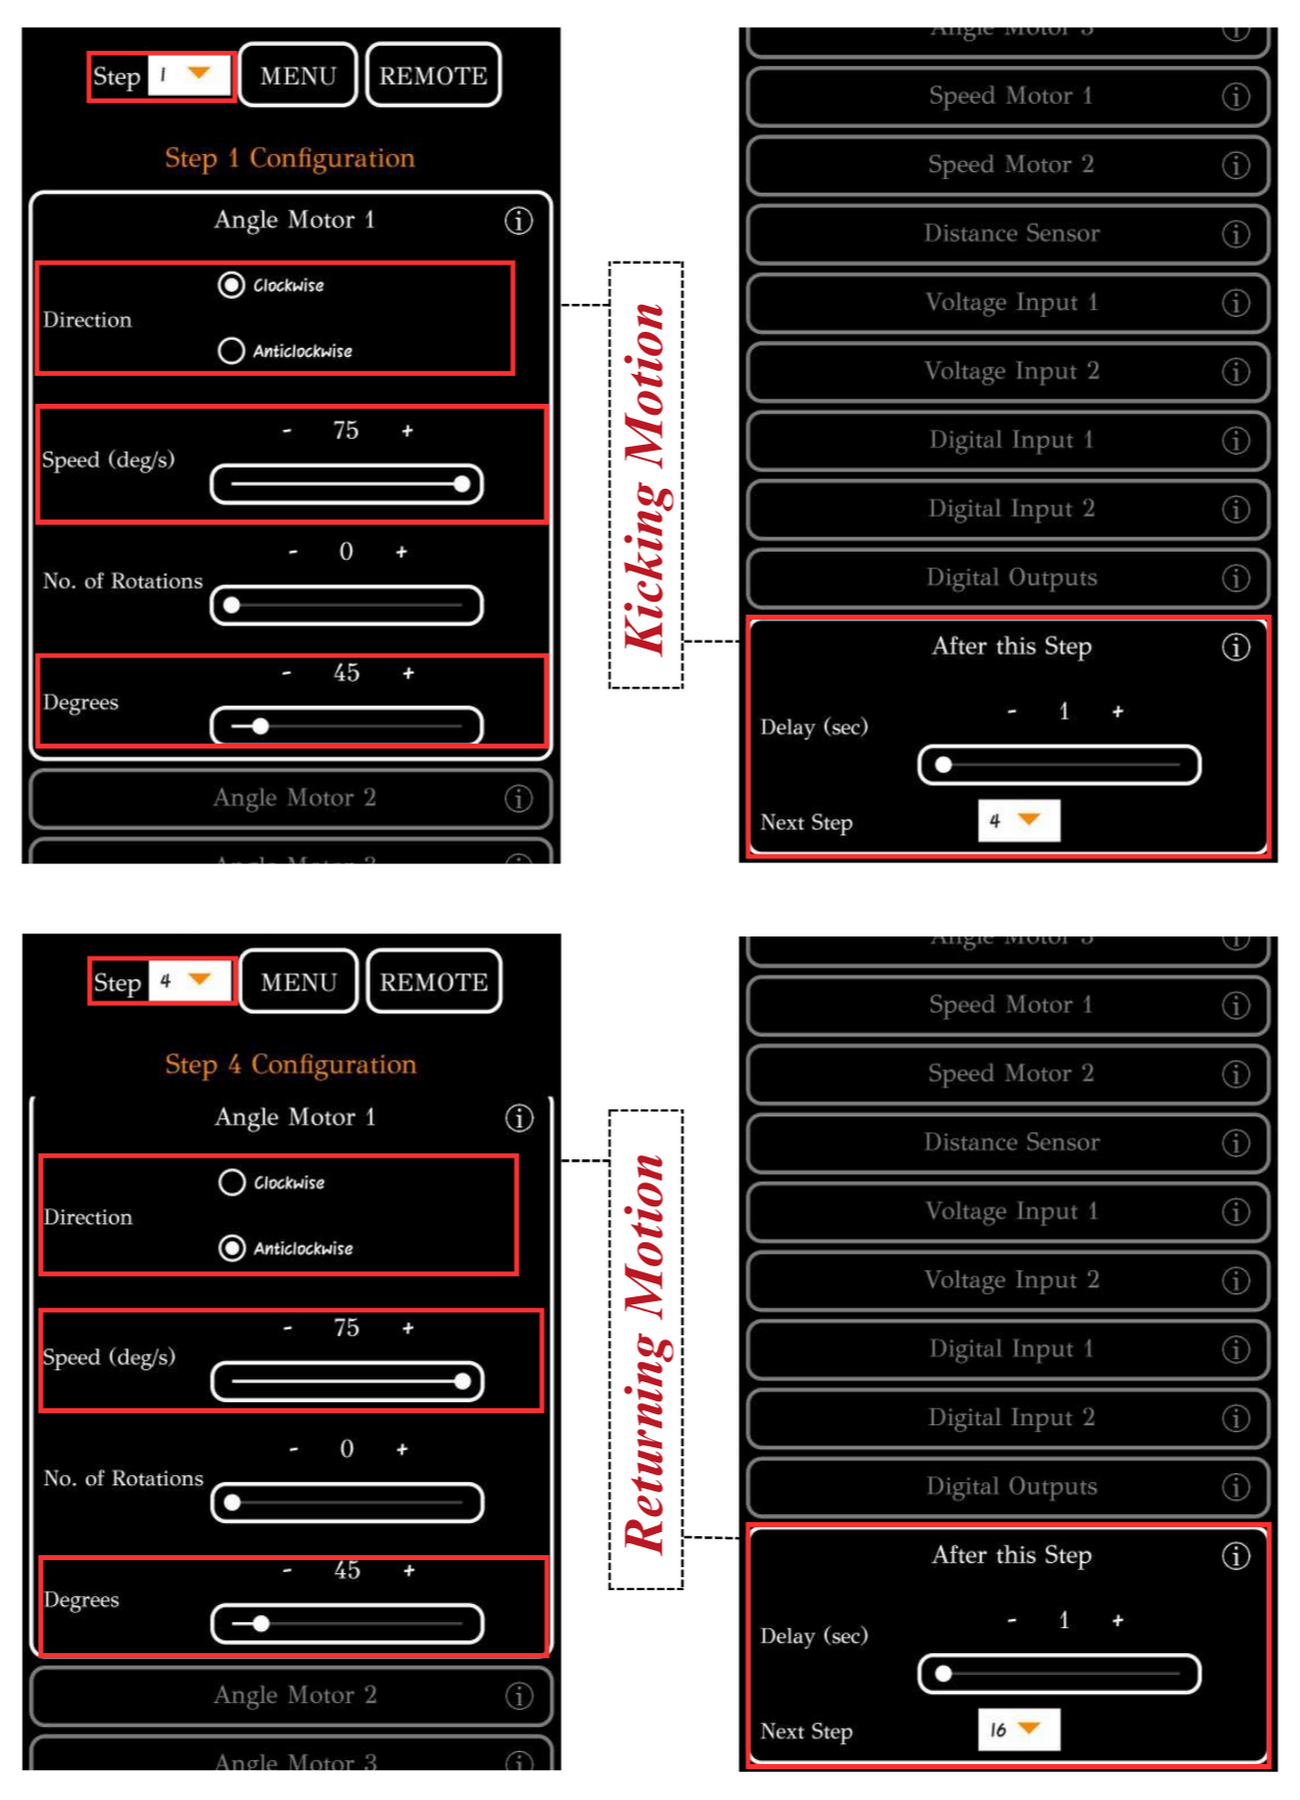
STEP 1 - Kicking motion
STEP 4 - Returning motion
STEP 8 - Forward motion
STEP 14 - Backward motion
STEP 10 - Leftward motion
STEP 12 - Rightward motion
TO "STOP" THE ROBOT CLICK ON ANY BUTTON OTHER THAN THE ABOVE CONFIGURED BUTTONS.
Note: Automate can be controlled using a cable by selecting the cable option instead of Wi-Fi under the remote option.
To upload the program, see How to upload the program to the Control Unit with Automate App?
Soccer robot is ready to play after uploading this program.
# More Information
For more details, see FAQs on Automate Kit.